
How to Build a Simple But Excellent Basement Putting Green
If you want to improve your stroke but don’t have the luxury of a backyard green or nearby golf course then I have good news for you: it’s easy to construct a putting green right in your basement. Even if you only acquire a simple rollout mat, basement putting greens may help you improve your stroke all year round (provided you commit to the practice and do the right drills). But with a little effort and investment you can level up your setup to create a top-notch, envy-inducing golf haven right in the comfort of home.
In this blog, we’re going to discuss the factors that affect the cost of this endeavor, the different types of indoor setups and putting surfaces, and the tools and materials you will need to build a simple but excellent putting green in your basement. If you’re ready to roll, then let’s get to it!
How Much Does a Basement Putting Green Cost?
Transforming your basement into a practice green is an exciting prospect, but the question that’s top of mind to most golfers is how much it will cost. The short answer is anywhere from tens of dollars to thousands of them, and where you fall in this range depends on the scope of your ambitions. To give you a straighter answer, we ran the numbers for a 4’ x 15’ basement putting green (detailed at the conclusion of this blog) and the total cost for DIY installation came out to approximately $550.
But we also discovered five key factors that have the most impact on your budget: the size of your setup, putting surface you choose, additional features you wish to build, how you’ll handle installation, and the lifecycle costs.
Factors that Affect the Cost of Your Putting Green
Size Matters: Just like in golf, size plays a big role here. A compact putting area won't break the bank, but as you expand your green, the price of your materials, putting surface, and accessories increases. Think of it like adding yards to a golf course – more space, more green, more bucks.
Type of Putting Surface: Are you going for the basic rollout mat or the full-blown professional synthetic turf? Rollout mats can be quite wallet-friendly, while high-end surfaces capable of mimicking the speed and consistency of real grass can have you digging deeper into those pockets.
Custom Features: If you want to trick out your basement green with features like a wooden putter stand, slope and made-to-measure framing, we salute you, but customization adds to the cost. It's like ordering a bespoke suit; it fits perfectly but costs a bit more. Depending on how much space you have and what you want to achieve with your at home golf practice, the increased price might be well worth it.
DIY vs Professional Installation: If you're handy with tools and willing to devote a weekend to the endeavor, a DIY indoor putting green can save some cash relative to the alternative of hiring a professional installer. There are plenty of build plans and YouTube how-to’s on the web that make it relatively straight forward. But for a seamless, pro-level green, hiring a capable craftsman might be a hole-in-one move. The time you’ll save and the fact that most installers pay less for materials since they buy in bulk is worth the tradeoff of having your basement green built for you while you dream of springtime birdies.
Maintenance and Accessories: Don't forget the ongoing costs. The more turbo your basement setup, the more upkeep it will require. Tour-grade putting surfaces need to be rolled out on an annual basis to keep them straight and true, and eventually you’ll need to replace the surface itself due to inevitable wear and tear. Keeping your green in top shape and adding accessories like flags and markers can add up over time.
In summary, prices can range from less than a hundred bucks for a simple setup to several thousand for a state-of-the-art green. That low range is perfectly adequate for many weekend warriors but nobody would be disappointed with a PGA Tour-worthy built-in putting area in their home. To figure out where you might fall, consider how much space you have (the larger the green, the more expense you’ll add), whether you’re willing to pay a premium for an advanced putting surface, and the cost of your build materials (or the expense of a professional installer). So, align your expectations, set your budget, and you’ll be one step closer to rolling putts in the comfort of home.
Choosing the Right Type of Putting Green for Your Basement
Before you lay down the funds and block a weekend for a putting green project, it’s wise to consider the range of options made available by your basement based on its size and layout. If you’ve got the space and want to dedicate it to a permanent green, then a DIY framed kit or even a custom installation might be the ticket. But if you don’t have much space, or your basement also serves as a kids playroom, you might want to consider simpler setups that can be moved or stored away when you aren’t grinding over your short game.


To help you decide, let’s explore three basic setups that can get you putting in your basement post haste.
Simple Setup: The Roll-Up Mat
Ideal for the budget-conscious or those with space constraints, the roll-up mat is the epitome of convenience and you know what? It’s perfectly capable of giving you all the practice you can handle. I have one in my office and whenever I get stuck on a boring conference call, being able to roll a couple putts is a workingman’s dream. They’re also a great option for smaller spaces because they can be rolled up and stored away when not in use. The only challenge here is finding the right one for you, as the market for stowable putting mats is wide and diverse. Here are some options for you to consider.
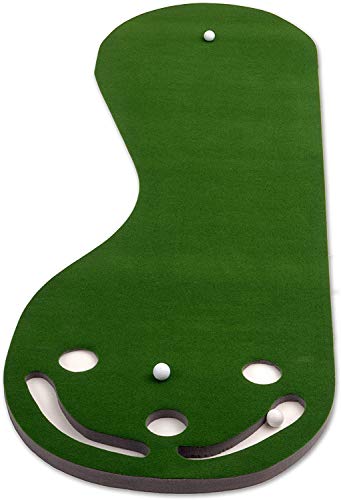
The Putt-A-Bout 3’ x 9’ Putting Mat: This is what I have, and the beauty is in the simplicity and affordability. It’s got three holes and a slight elevation approaching the holes, which is good for speed control, and at 9’ long it gives me the ability to work on those crucial mid and short range putts. It costs less than a dozen ProV1s and when I’m not using it (which isn’t often), rolls up like a blanket, and has held up well in a high traffic area going on two years now. No complaints, but no bells and whistles either.
The Wellputt 2.0 10’ Matt: At first glance, the Wellputt looks like a simple strip of turf but look closer and you’ll see multiple visual aids for body and putter alignment, amplitudinal guidelines for stroke control, and eye positioning cues to assist with muscle memory and body position. In total, it’s got 10 different exercises and two different rolling speeds for golfers who are serious about drilling. The only issue some might have is there are no “cups” on this mat, just simulated golf holes, so you won’t get the satisfaction of hearing your ball drop in.
The Pro Putt 10’ Green With Ball Return: This 10’ putting mat helps you improve skills on short to medium distance putts and even features an 18 hole putting course with escalating difficulties, which might help people focus on their practice while scratching that competitive itch. But one of the best features of the Pro Putt is the “challenge” hole, which sits to the right of the regulation cup and is three-quarters of the size of the standard golf hole to demand heightened precision and focus. The backstop and ball return are also nice features, but make the setup slightly more cumbersome to setup or stowaway.
The Big Moss Augusta 4’ x 12’ Putting Green: Big Moss’s claim to fame is being consistently voted as the best indoor putting green by many of the PGA’s top 100 teaching professionals. Their surfaces simulate realistic golf conditions while still being portable enough to stowaway. The Augusta model is a 4’ x 12’ premium surface that can be used for putting and light chipping, featuring a roll akin to freshly cut bent grass and true-roll downgrain. But the best feature of the Big Moss setup are the included “break snakes” that allow you to create unlimited contours and breaks to challenge yourself and your practice.
Moderate Setup: The DIY Framed Kit
Stepping up a notch, pre-packaged DIY kits from outfitters like Camry Golf bring a more authentic and bespoke feel to your basement golf oasis. These typically involve a simple square or rectangular framed setup that you can assemble with basic tools and general expertise. They strike a nice balance between realism and convenience, much like upgrading from a minigolf course to a full-fledged putting green. There’s actually a range within the range here, as some DIY kits can be quite advanced (like the 4’ x 15’ project we detail below) while options like the Perfect Practice simply involve snapping a few pieces together.
Complex Setup: The Custom Contoured Green
For the serious golfer with space and resources, custom contoured greens are the ultimate indulgence. These setups can include realistic slopes, multiple holes, and even areas for light chipping. It’s the closest thing to having a real putting green in your home. While this option can be pricey and might require professional installation, especially if you want to build it into your basement floor plan, the result is a golfer's dream come true – a personal training ground for perfecting golf’s most important stroke. For an idea of just how complicated this build can be, check out YouTuber Kevin Hanchuk’s 10 minute demo of how he constructed his indoor putting green with adjustable slopes.
Each setup offers unique benefits. Whether you want the space-saving convenience of a roll-up mat or an elaborate custom job to mimic real-course challenges, there’s a basement putting green for every golfer’s need and space. So, assess your space, consider your golfing goals, and choose the setup that best suits your basement clubhouse because next, we’re going to look at the best surfaces for an indoor green.


The Best Surfaces for Indoor Putting Greens
If you’re intent on creating your ideal basement green, you don’t want to fumble the bag with cheap material. Choosing the right surface is crucial for an authentic golfing experience, and the the ideal surface varies based on the complexity of your setup.
What to Look for in a Simple Putting Surface
For a roll-up mat, look for a surface that offers consistent roll and durability. These mats might not mimic the exact feel of a golf course but are excellent for honing your putting stroke indoors. Golf YouTuber Zac Radford reviewed four of the more popular indoor mats, any of which would work great in limited space. Personally, I think if you’re looking for a rollup mat you need to keep your expectations in check. You aren’t going to get a tour quality surface, but that shouldn’t deter you from exploring this option, and you’ll still get valuable practice on the fundamentals of stroke, speed and alignment.
What to Look for in a Moderate Putting Surface
If you’re willing to make the investment in a framed DIY kit, you want an enhanced synthetic surface that offers more realistic feedback, akin to an actual green. Look for synthetic turfs that balance a smooth roll with a bit of resistance, but still move fast enough to keep your speed true. It's about getting that 'golf course' feel without leaving your home, and the cut-to-size mats offered by Camry Golf Greens are some of the best in the business.
What to Look for in a High-End Putting Surface
For the ultimate indoor green, opt for top-tier synthetic turfs that replicate the speed, bounce, and roll of a real golf course. These surfaces are designed for contouring and slopes, offering a near-authentic golf experience. A short pile synthetic turf that offers some resistance can also give you with the ability to practice short chips right in your basement, especially when laid on a properly built foundation. While a high-end surface might not come close to approximating the perfectly manicured greens of Augusta National in your basement, you’ll be amazed at how responsive they can be.
Regardless of the setup, the key is to find a surface that suits your space, budget, and golfing needs. Even the simplest mat can significantly improve your putting game, making every stroke a step towards becoming a putting maestro. Remember, the best surface is the one that keeps you putting, whether it's a basic mat or a pro-grade turf. Don’t be afraid to start with something simple and improve it through the years.
Tools and Materials Needed for Advanced Basement Putting Projects
So now that we’ve covered all the factors and considerations for your indoor putting project, let’s walk through a build plan you can actually achieve with a little elbow grease, some online shopping, and a trip to Home Depot. This is all based on a 4’ x 15’ putting surface, and while you can modify this plan for any size green you’d like to build, our market research has determined this is the optimal size for minimizing materials costs and maximizing the use of prefabricated components.

Is building a basement putting green as simple as asking AI to create an image? No, but the results are better!
What You’ll Need to Build a 4’ x 15’ Putting Surface
When it comes to building this semi-advanced basement putting green, having the right tools and materials before you start makes the project easier to complete and with far fewer headaches. As mentioned above, opting for a 4’ x 15’ surface means you can take advantage of prefabricated components and reduce the amount of cutting, adhering, and assembling required to deliver a finished product.
If you don’t have the length for a 15’ green, it’s easier to trim down the materials but if you want to go longer than 15’, we recommend doing so in 6’ increments. Most importantly, measure out and specify a diagram that is true to scale so you can be certain that your green will fit in your space. Then measure all your raw materials twice before you cut. If you do all of the prep work before you start, you can easily complete this project in a weekend.
Putting Surface: We recommend Camry Golf Greens for the highest-quality putting surfaces that are used by PGA Tour pros. Their surfaces roll true and at an 11 on the Stimpmeter, you’ll find the pace sufficient for your needs. One note, the Camry putting surface comes in a dark gray color that looks great in any room, but traditionalists who want that golf “green” color might want to consider other options. Their website is also a bit wonky, but they’re golf specialists not web developers! Their 4’ x 15’ foot carpet also includes a DIY build plan.
Build Materials: You’ll need to create a base for your putting surface. While you can certainly build a wooden frame with 2’ x 4’ lumber, the easier approach is to simply use foam insulation boards from your local hardware store as your base layer. You can then reinforce the insulation boards with a piece of plywood (½ an inch to ¾ of an inch is recommended) adhered to the base using an all purpose construction adhesive. On top of the plywood, add a layer of carpet padding and then a wood fiber underlayment which acts as a shock absorber and noise reducer for your putting surface.
Tools & Accessories: Before you lay your putting surface down, you’ll want to determine the location for your holes. With a four foot wide green, you can easily fit three holes, but you will want to make sure you cut them to the PGA standard. Use this specific drill bit to accomplish this step, as you’ll need to cut slightly deeper than 4” to accommodate a regulation-sized golf cup.
The next step is to lay your putting surface onto your completed base and use a finishing trowel to smooth out the bumps and ensure the surface fibers are consistent. Then, it’s time to cut your holes with a carpet knife, which you can find at any hardware store. That is all you will need for a basic setup, but if you want next level, you can use heavy duty furniture levelers to introduce slope and break to your basement putting green.
Your Basement Golf Green Shopping List
Below, we’ve listed each of the items you’ll need for your 4’ x 15 indoor basement putting green and where you can buy them. These are affiliate links, so we will earn a small referral fee for any purchases you make using them (at no additional cost to you). We use these earnings to fund the Great Golf Blog, and appreciate your support! We’ve also created a free printable list of materials and approximate costs to make your shopping experience more convenient.
Camry Golf Greens
Camry Greens Carpet Roll (4.5’ x 15’): https://camrygolf.com/product/54x-180-roll/ref/13/
Putting Green Levers (for adding slope and break): https://camrygolf.com/product/heavy-duty-golf-putting-green-levers-for-slope-break/ref/13/
Home Depot
3 Units of Foam Insulation Board (4’ x 6’): https://fave.co/3tz5vxq
2 Units of Sanded Pine Plywood: https://fave.co/3H1hOWo
All Purpose Construction Adhesive (“Liquid Nails”): https://fave.co/48xmL52
3 Units of Carpet Pad (4’ x 6’): https://fave.co/48zlomn
Wood Fiber Underlayment (90 square ft): https://fave.co/41DTxPQ
Finishing Trowel: https://fave.co/3tuLZCt
Drill Bit for the Golf Holes: https://fave.co/3NMfsyp
Also on Amazon: https://amzn.to/4aHXl6A
Amazon
Heavy Duty Furniture Levelers: https://amzn.to/47jeukh
Golf Holes: https://amzn.to/3tyAiup
Remember, the quality of your tools and materials directly impacts the final outcome of your putting green. By choosing the right materials for your job and your budget, you will ensure a smooth build and a green that will last many rounds.
Regardless of the size and scope of your basement putting green, it’s the effort and dedication you make that will determine how good of a putter you can become. So after you select the right indoor putting setup for you, check out our recommendations for drills and accessories you can use to perfect your at-home putting practice and our guide to indoor club displays to keep everything organized. Good luck, and happy putting!
This post may contain affiliate links and we may earn a small commission if you use them to purchase products, at no additional cost to you. As an affiliate partner to premier platforms like Amazon and Top Shelf Golf, we help fund this blog with the earnings we make from qualifying purchases. Thank you for supporting the Great Golf Blog!